Beginning AR
It is quite common that Accounts Receivable is not converted from your previous system into EPASS. This will show you how to enter the beginning balances for customers.
Sign-in and Transaction Date: It is very important to sign-in as a date prior to going live when processing these beginning transactions. This will post these transaction to the GL as a prior period, and it will be very easy for the EPASS technical support team to clear it out of the GL. In our example our company is going live April 1st, so we are signing in as March 31st.
Steps
-
Keying in Invoices
-
A/R Posting
-
Reconciling with the Aged Trial Balance
Keying In Invoices
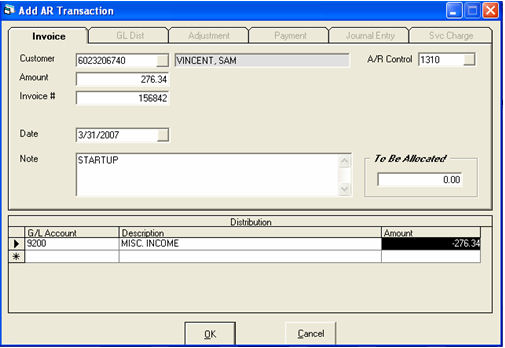
AR > Transaction Processing > Add > Invoice
The invoice option is only used during startup; it is not part of regular daily AR procedures. All future invoicing will be done through the invoicing system.
-
Customer: The browse button is available to search/add/edit customers.
-
Amount: The balance of the invoice. It is much easier to key in one entry for the balance of the invoice versus multiple entries for any payments and adjustments. Your previous software system or final AR report from the previous system can always be kept to answer questions.
-
Invoice #: The invoice number from the previous system.
-
Date: Today’s date.
-
Note: A simple note to remind you this was startup is always helpful.
-
A/R Control: Defaulted from AR variables normally does not change.
-
To be Allocated: The system will show the amount of money left to be distributed.
-
G/L Account: It is suggested to use one GL account for all beginning AR, but what account you use does not matter since the GL transactions will later be cleared out by the EPASS technical support team.
-
Description: Filled in by the system.
-
Amount: Defaulted to the amount keyed in above. When ‘To Be Allocated’ is zero, you can click OK.
Variation
If you do not want to key in each invoice for each customer, you could simply key in one entry per customer as their total AR balance. In this case you would change the invoice number to be a word like ‘STARTUP’. EPASS has no problem with invoice numbers being words. Although this method would be faster, it will require more regular referrals to your previous system to research payments and balances. The method shown initially is our suggested route.
AR Posting
AR > Post Transactions
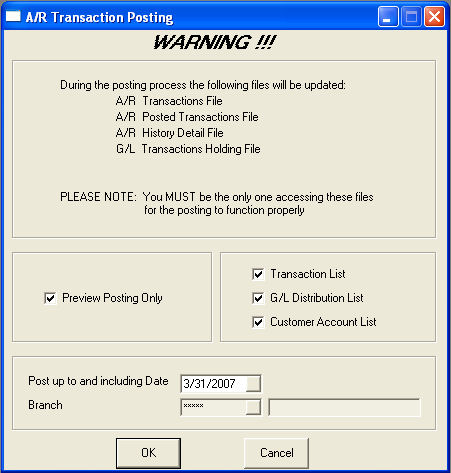
Make sure you are signed in as the correct date prior to posting. Of the three reports shown on the screen the first and last are most important. You could uncheck the ‘G/L Distribution List’. It is best to post small batches at a time. This will make it easier to find errors. If you are working from a printout from your previous system, maybe post every time you key in a couple of pages worth of entries.
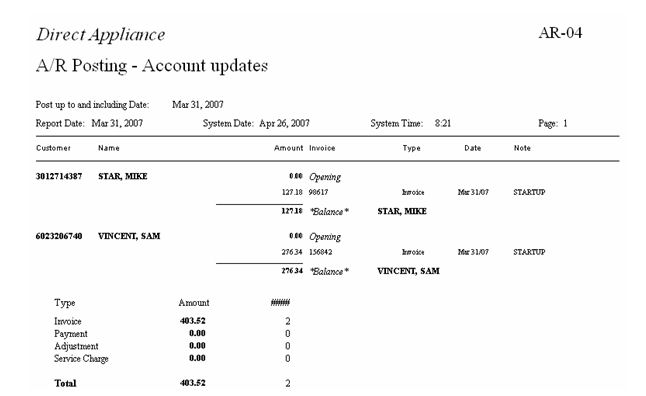
Reports
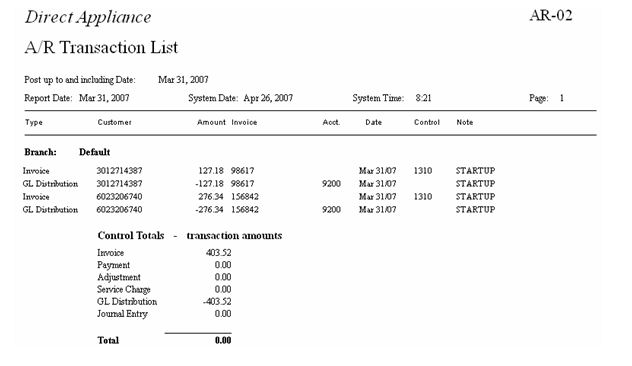
We can use either the ‘A/R Transaction List’ to balance what we have entered or use the ‘A/R Posting – Account Updates’. Both reports will do the job.
Reconciling with the Aged Trial Balance
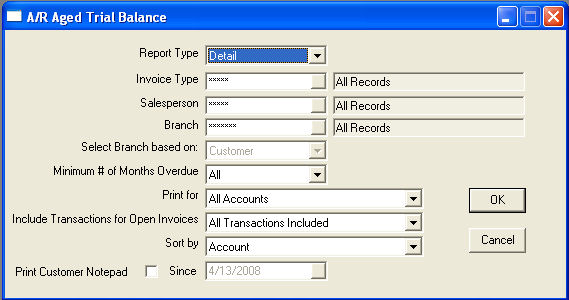
AR > Reports > AR-06 Aged Trial Balance
Once all the posting are complete, you need to do a final reconciliation. With each posting being checked, the Aged Trial Balance should match your listing from your previous system. Make sure to select ‘Detail’ for the report type.
Now go through the Aged Trial Balance and compare the totals with your previous system. As long as they match, you did everything correct. If some mistakes were make AR Transactions > Add > Adjustment can be used to make correcting entries.
